Hi!
Today I want to share some of the planner hacks, tips and tricks I’ve used and liked over the years I’ve been using a planner. These hacks have helped bring more functionality to my planner and general organisation. Most of these can be used in any type of planner (ringed or bound), so hopefully you will also find this list useful no matter what kind of planner you’re using at the moment. I didn’t invent any of these hacks but have learned of them over the years of being in the planner community. If you do know who first came up with these hacks, let us know in the comment section below. So in no particular order, let’s begin.
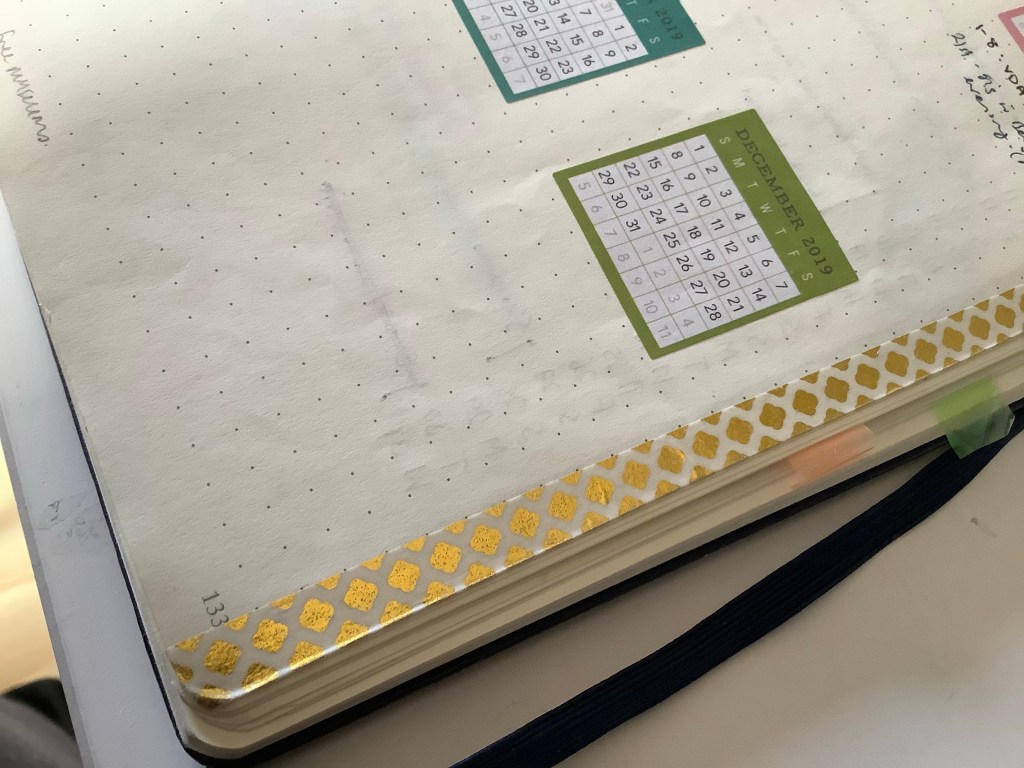
- Colour coding
Colour coding is something that I used when I started seriously using my planner for organising my life (see below inserts from 2014!). Because the month on 2 pages were usually too small for me to write anything significant on it, I would use coloured dot stickers or even just a coloured pencil to indicate events, appointments and so on. I really loved this as I could see at a quick glance what my month was looking like.
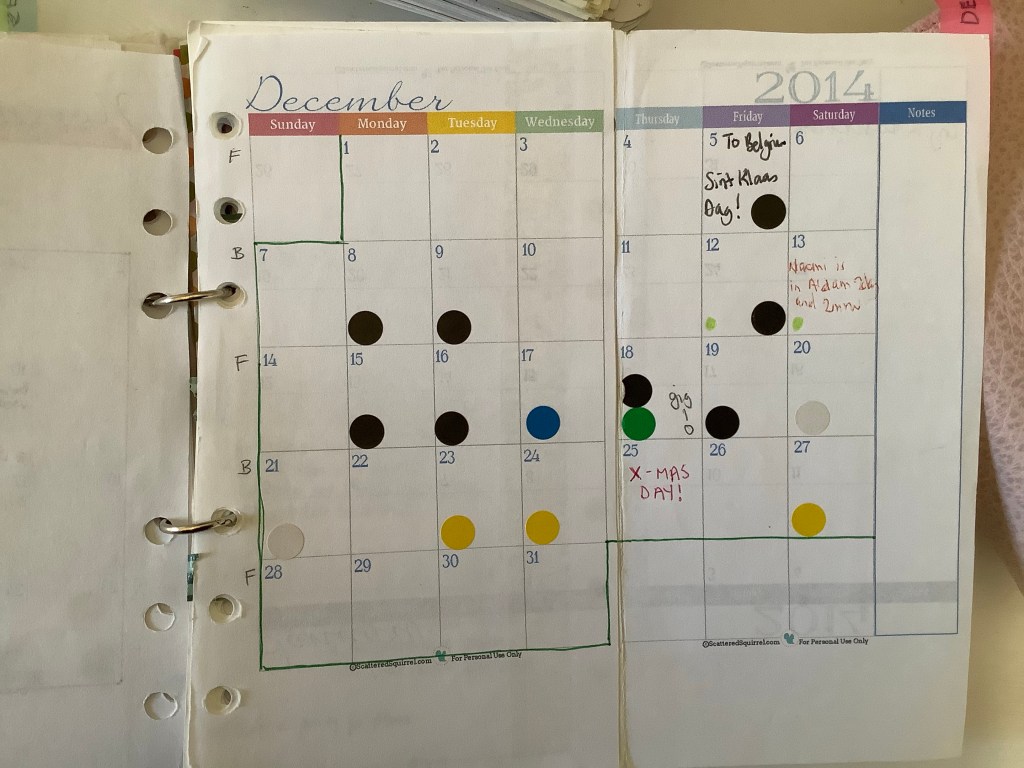
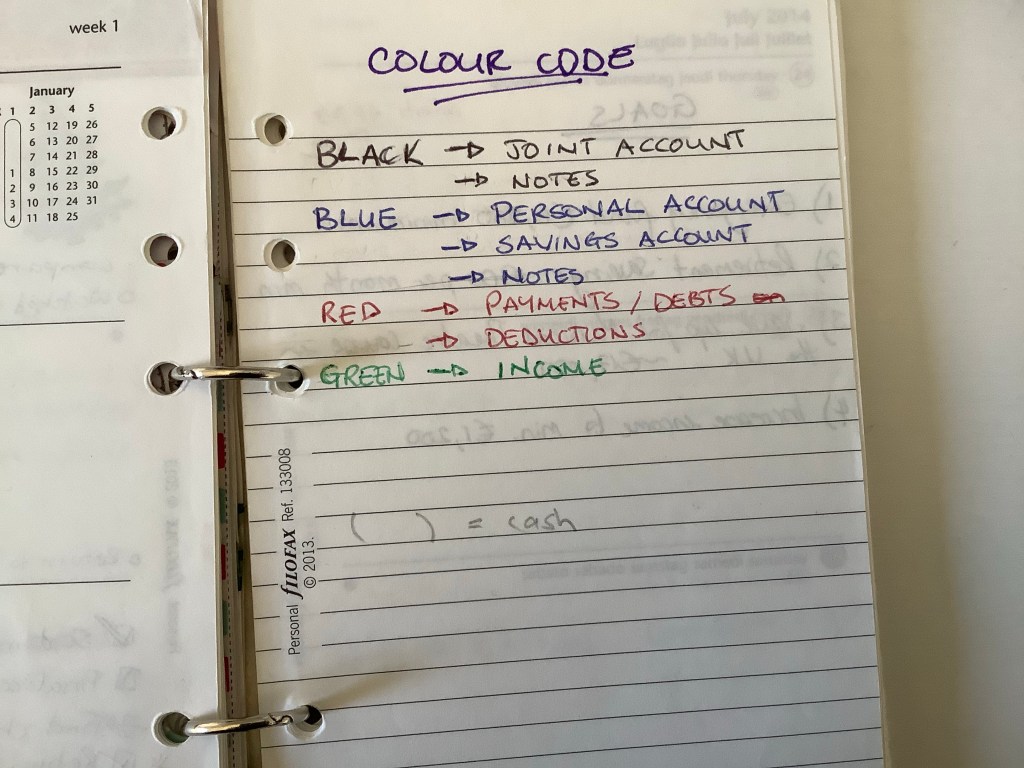
Another place I used colour coding was when I was attempting to track my cash flow. Here I used different coloured pens to indicate from which account was I spending from.
My dyslexic brain just loves colour coding. I find that I can easily pick out and process the information that I need and saves me time and brain power. Side benefit is that it adds some “pretty” to your planner depending on how and what you use to colour code. Aside from coloured dots and coloured pens, you can use highlighters, coloured pencils, washi tape, page flags, stickers, basically anything that comes in different colours to colour code anything and everything in your planner.
2. Bullet journal keys
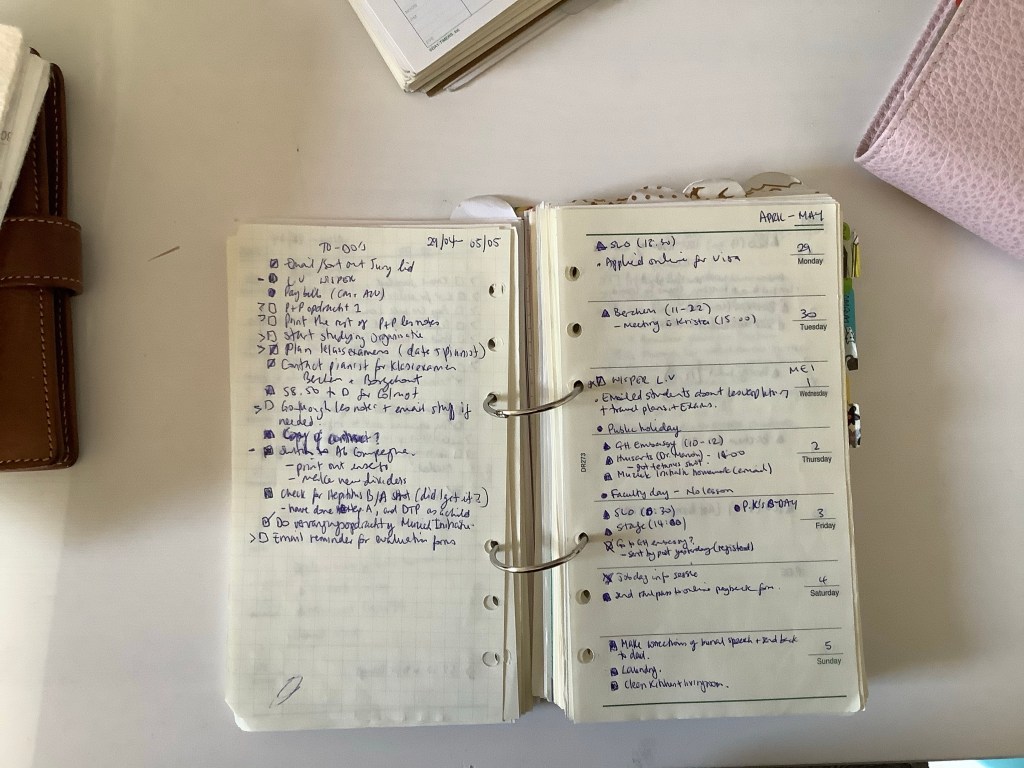
This is also something I started quite early on in my planning journey before the BJ method got popular. Using different bullets, icons, and signifiers is also very handy in organising your your notes, lists, and whatever else you write down in your planner. It saves time and brain power as I can see at a glance what kinds of things I have to do that day (appointment or task), and if it’s done or not (filled in vs not filled in box or triangle). With the signifiers I can see if something has been moved forward, or what kind of note I’ve written down. In other words if it was a note for work (W), or a random idea (!), or something regarding finances ($). This also helps when searching back for information. If I’m searching for something I wrote down regarding work, I just have to browse my previous pages and pay attention only to the notes that have a “W” in front of it. I don’t have to read every single note I wrote in order to find what I’m looking for. Such a time saver and easier on my eyes and brain! lol
3. Reenforcing and cutting slits into the holes
So this hack is for ringed planners. If you’ve read my blog for some time you will know that the biggest reason I’m a fan of ringed planners is because of its flexibility. You want your to-do lists in the front? No problem. A few months later you decide that you don’t need a particular project section because you’ve finished the project (or you’ve decided not to go through with it)? Also no problem. Just remove the pages and add then back in later if you need them again. You don’t have to carry around inserts and information that isn’t relevant any more, and you can rearrange your set up to suit you at any given time.
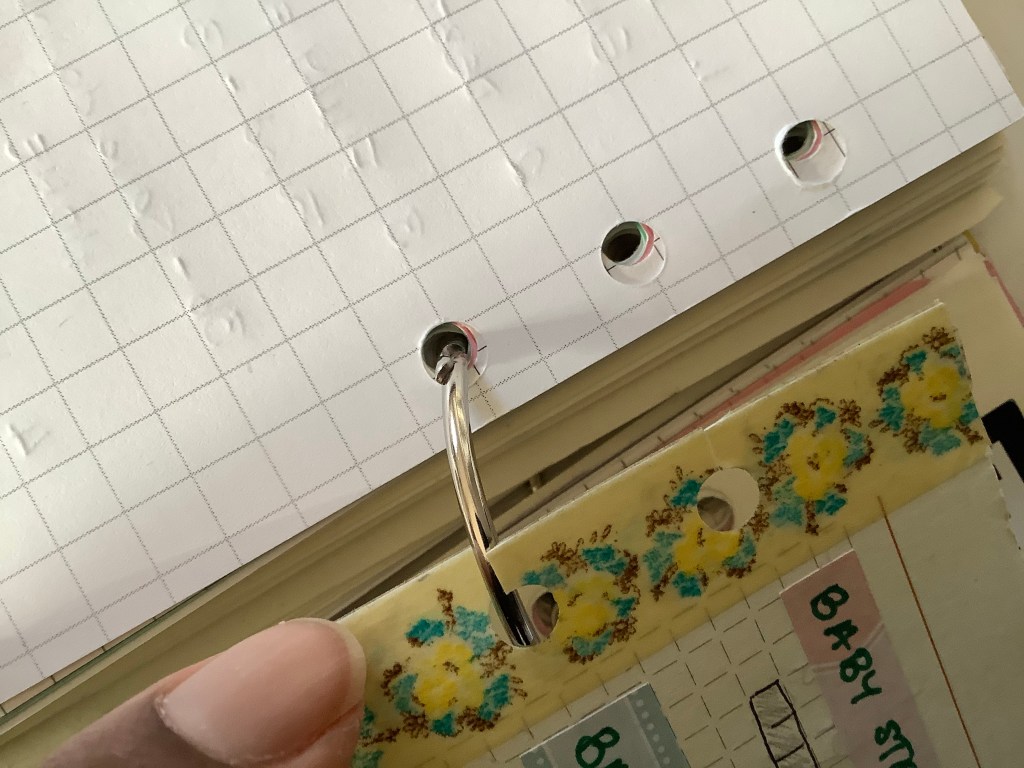
However, as much as I love that advantage, always opening and closing your rings can be tiring sometimes, especially if the ring mechanism is tight and/or is being stubborn. This is where making slits in the holes is genius! By doing this, you can take your inserts in and out of the rings without having to actually open the rings! Love it!!! Now, if you do this often then of course you risk damaging the inserts, but the inserts don’t get damaged if you reinforce the holes. The inserts still stay in the rings despite the slit that you’ve made. You can do this with traditional hole reinforcers (the donut looking stickers) or washi tape (as shown in the picture above).
4. Highlighting what I’ve done to make what I haven’t done stand out.
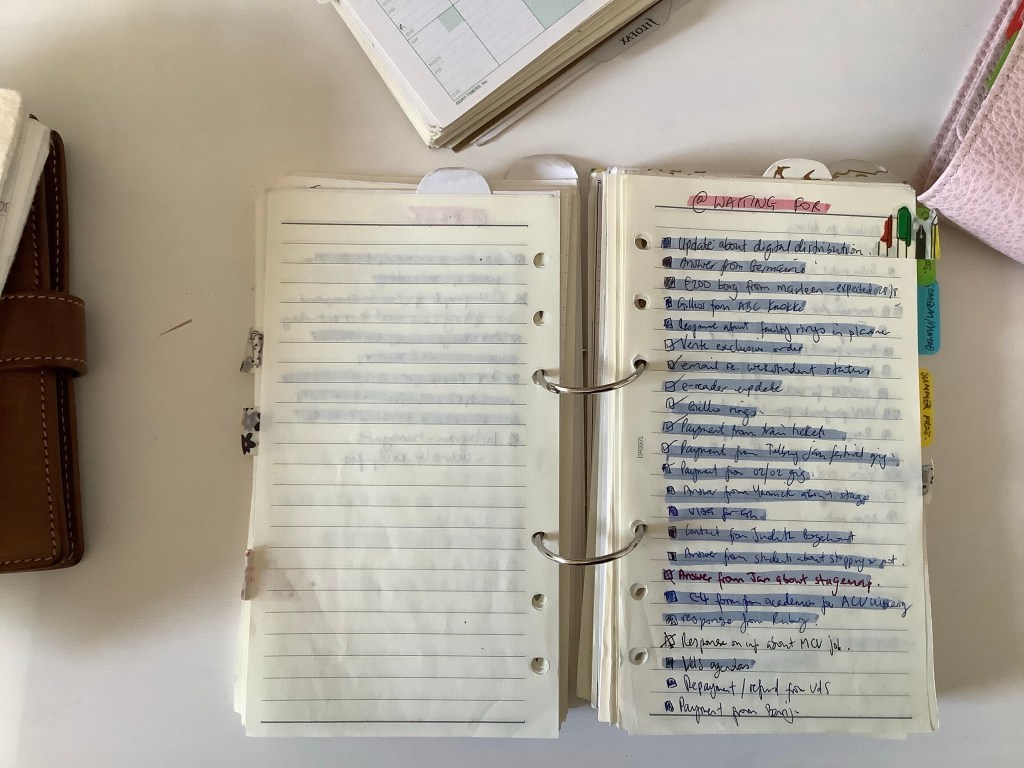
The first time I saw this I thought it quite counter intuitive. After all, in high school I used a highlighter to make certain notes stand out in my notebook or text book. After all, it is called a “highlighter”! However, I gave it a try and to my surprise I found that it worked for me. My eyes would focus on the unhighlighted tasks, again just making it easier to see at glance to 1. see how many tasks I’ve done vs not done, therefore tracking my progress which can be motivating, and 2. see quickly which tasks still needs to be completed. You know that satisfying feeling you get when you’re checking things off your list? Well for me, using a highlighter adds to that feeling.
5. Washi tape as a bookmark instead of tabs, dividers, or page flags
I learned of this hack from the BJ community. Basically, instead of using tabs or page flags for pages that you frequently turn to, you washi tape the edge of the paper so that when it’s closed, you can see it and can quickly turn to that page. You can combine this with colour coding so that all pages with green washi are pages concerning budgeting, and all pages with red washi are your YouTube notes, or your master project list for example. Now although this is mainly used in bound planners, I can see how this can also be useful in ringed planners. Whilst I love the look of a planner filled with page flags and tabs, I have found that sometimes the tabs or page flags get damaged easily, lose it’s stickiness, or interfere with the pen in the pen loop. Using dividers as tabs takes up ring space and may prevent you from being able to add more inserts in your planner. Additionally, I personally like a compact planner. This means that I prefer my planner covers to be as close to the size of my inserts as possible with only enough space for the pens in the pen loops and top and bottom tabs. Being able to have tabs on the side also means needing a wider planner. By washi taping the edge of the paper, I could navigate to certain pages from the side view as well. I haven’t tried this in a ringed planner yet but I definitely want to.
Okay, so these are the first 5 of 10 hacks, tips and tricks that I wanted to share with you. I’ve decided to split this post into two because it’s already getting quite long. Are these things that you already do in your planner? Where did you first hear of these hacks and tips? In any case, I hope you have found this blog post useful and have learned something or been inspired somehow by it to make your planning and organisation even better. If you’re interested to know about the other 5 hacks, make sure to subscribe or follow so you know when I’ve posted it up.
’till next time,
P.
