Hello!
Today I will carry on sharing what how I used my planner last year and also how I’ve archived the pages. This is the second part of a two part post, so if you haven’t already, you can read the first part here.
The dividers I used in my planner were the ones that came with the Filofax. They are the blue and green, 1-6 Filofax dividers. I used plain white masking tape to cover up the numbers and name the sections. The sections were:
Year overview, Months, Weeks, Lists, Contacts, and Finance
Weeks:
I started using my planner in August of 2014. I had watched lots of videos and discovered “washi tape”. Something that I had never heard of before then! So I bought some from some local hobby shops and attempted to make my pages look pretty. Was not so successful at it :p. Quickly realised that I would need thinner washi tape in my arsenal. Trying to cut thicker washi tape into thin strips was not easy for me to do and turned out looking messy.
Another thing that I discovered was the spiraldex, and bullet journaling.

Both systems appealed to me and I couldn’t decide which one to use…so I used both :).

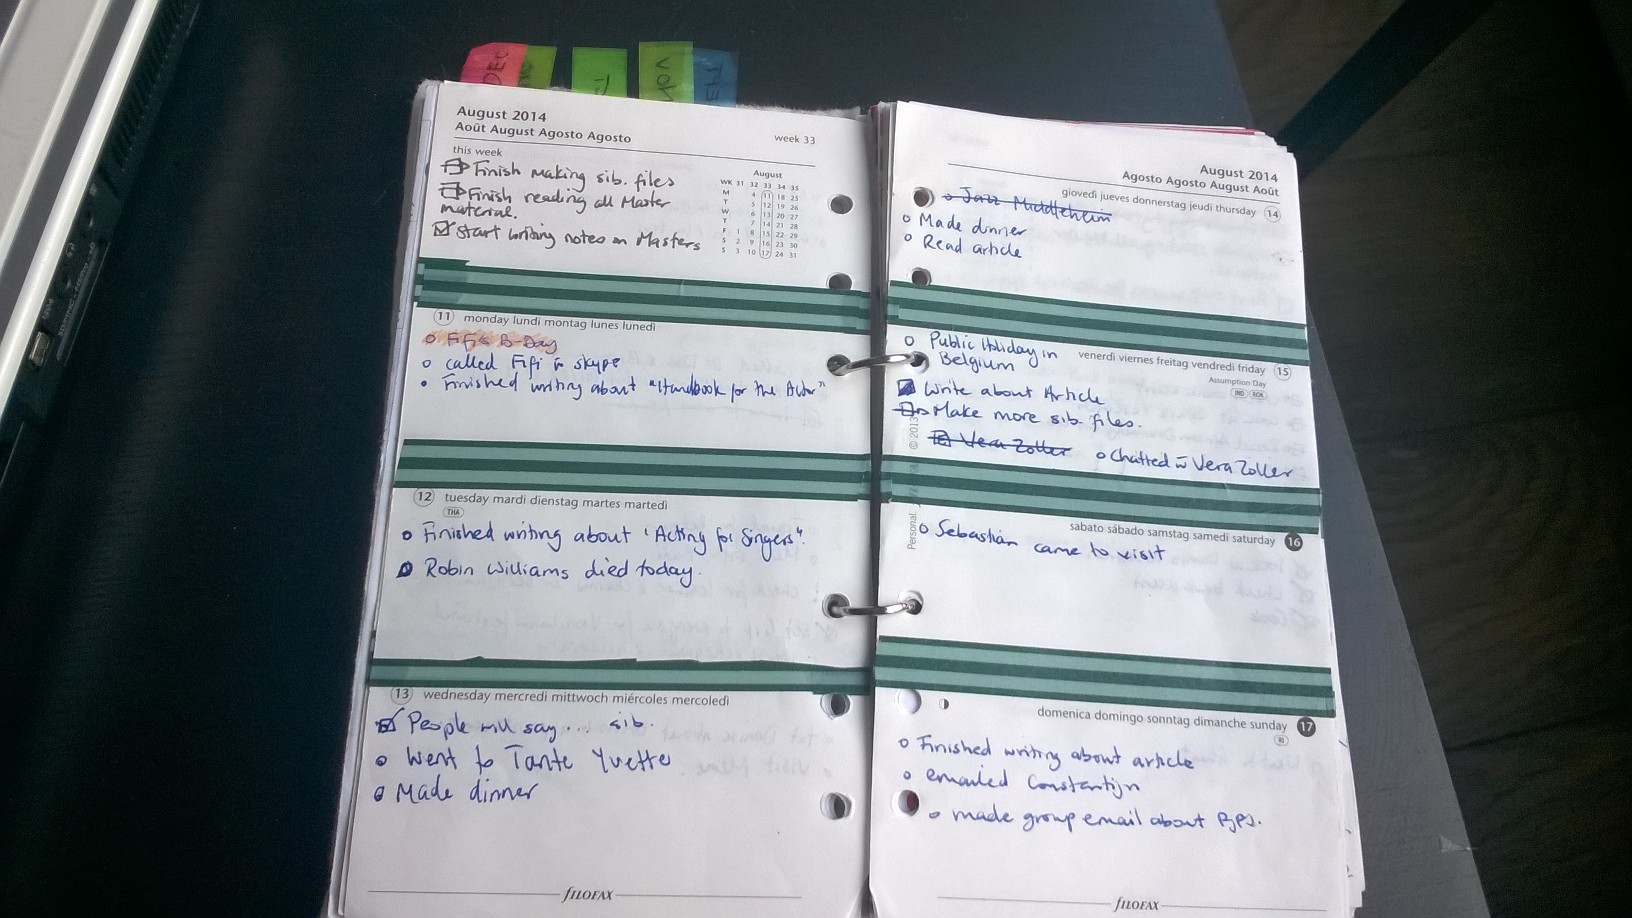
This turned out to be very good because when school and work started I had a lot of “to do” things to write down. I also wanted to write down “events” or things that had happened that day. With a week on two page format, it is not a lot of room (for me) to write all those things down, as well as appointments. But with the spiraldex, I could shade in my time sensitive appointments and schedule, leaving the pages free for other notes and tasks.
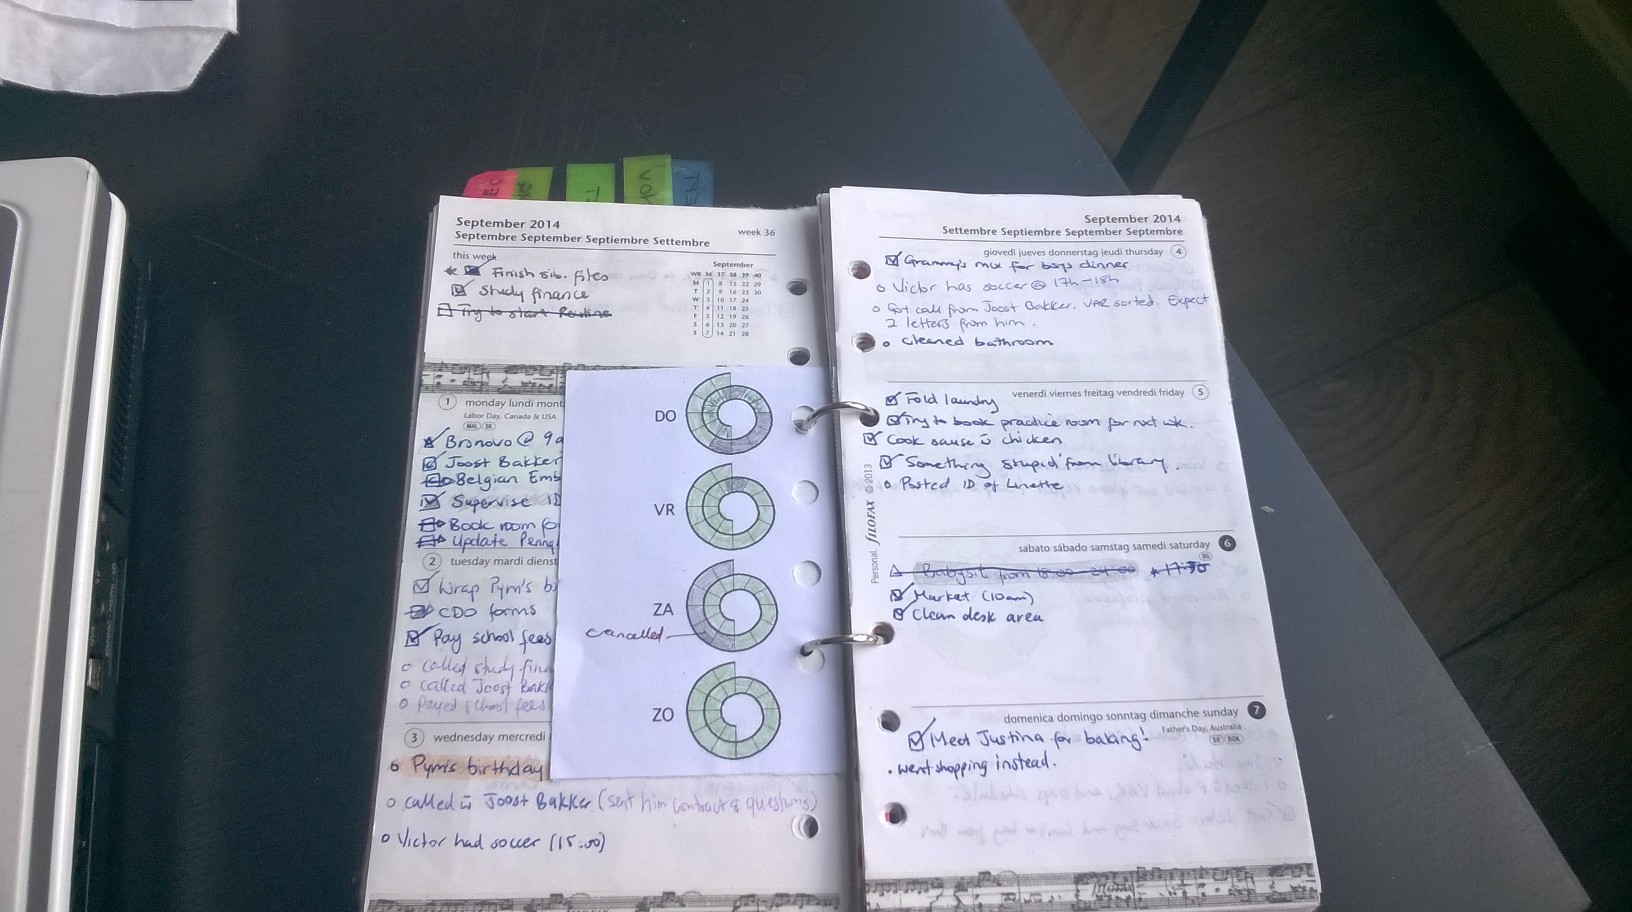
But as the weeks went on, some appointments landed on the pages. In particular, the appointments that were booked ahead of time. This is because I only made the spiraldex insert on the sunday before the following week started. Also, the spiraldex became more of a tracking device than a planning device. I found this very useful because I always feel like I don’t have enough time for things, but I also think that I don’t use my time wisely. This way I could track how much time I was spending on whatever it was. This also came in handy for getting paid, when I had to report how much time I spent on extra babysitting. I’m really terrible at remembering these things and with the spiraldex, I could just mark of what time I actually started and finished (which is sometimes different to the time that is agreed upon previously). So for example, on the planner page I will put down, babysit at 10:00 for 2 hours as that is what I would have been asked. On the spiraldex, it will indicate that i started at 10:30 and was there for 3 hours because the plans changed and that is what I actually ended up doing.
Eventually I got tired of printing and cutting out the spiraldex. And since my tasks became fewer and my schedule started to settle, the space on the pages were enough. I also tried to incorporate colour coding to make some things stand out, like birthdays, and gigs, and extra working days. To track those extra working hours, I just wrote down the starting time, and when I finished, I wrote in the finishing time.

However, sometimes appointments get cancelled and I don’t like crossing things out. So I started using the page flags for forward planning and colour coding at the same time. A great solution as if the appointment gets cancelled, you just throw the page flag away :).

Above you can see I got some new stamps and stickers that I tried out. Will have to practice using them better :p. The decorating skills hadn’t improved much…
Lists:
In the lists section I made to-do lists of “projects” that I had. For example, things that I needed to do for my research, or for handmade projects. I used the regular Filofax to do sheets that came with the binder.
Contacts:
I have a bad history with phones. They get lost, stolen, broken…it’s terrible. And every time it’s a drag to get back people’s numbers (I never get them all back). So I decided that I need a place at least to write down the most important phone numbers (family, boss, etc) incase my battery dies, or it gets lost/stolen/broken.
Finance:
For obvious reasons I will not show you my finance pages. But what I did was use some filofax W2P inserts that I had from another binder to track my spending and income. I tried colour coding as well.

Archiving:
As already mentioned in my previous post, I was looking around and hadn’t seen many different solutions for archiving planner pages that I felt I could use. I’m not a big Evernote user, and I didn’t like the look of the archiving binders that Filofax produces. I have seen, people using other Filofax binders to house their old pages, but I didn’t want to do that. I didn’t like the idea of one of my beloved Filofaxes sitting of the shelf, only holding pages and not really being used outside in the real world.
So in the meantime, I was making plans to make a desktop calendar as a christmas present for someone, and came across some rings. Single rings. At the same time, I was also starting to make fauxdori’s…bingo!!! I had an idea!!! 😀 I would use the remaining leather as a cover, punch holes in the proper places and use the rings to hold everything together!
But before I did that, I made a mistake on a felt fauxdori I was making. I had cut it too small. Lucky for me, it was the perfect size for the personal size inserts. So I got to make my archive…binder?…sooner that expected. I prepared to cut six holes but decided on two holes were actually needed. Here are the results:


It’s a bit annoying sometimes to put in pages, but since i’m not in and out of it a lot, it’s fine for now. Perhaps if I can find the proper 6-ring mechanism I will use that instead. Just because it would be easier to open and close. Maybe a 30mm one :).
So that’s it folks! Hope you enjoyed my first “series”. Would love to hear about your set ups and how you’ve dealt with archiving previous planner pages.
‘Till next time,
P.

Leave a comment